
This guide walks you through creating a virtual machine (VM) on a standalone VMware ESXi host using Terraform. You’ll learn how to:
- Install Terraform
- Prepare your ESXi environment
- Write Terraform configuration files
Provision and destroy VMs with Terraform
Prerequisites: In my environment, I have the following;
- VMware ESXi host 7.0
- A user with sufficient privileges
- ISO image uploaded to EXSI host datastore
- Terraform installed
Project Structure
bash
terraform-vm-esxi/
├── main.tf
├── variables.tf
├── terraform.tfvars
└── outputs.tf

Step 1: Installation of Terraform
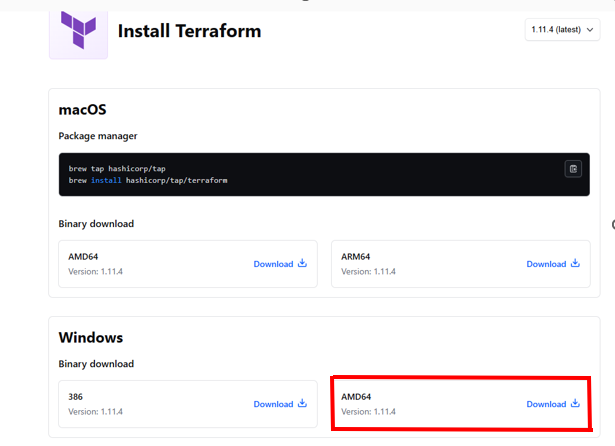
Navigate to the terraform download page(https://www.terraform.io/downloads.html) and select the appropriate version for Windows. Download the zip file
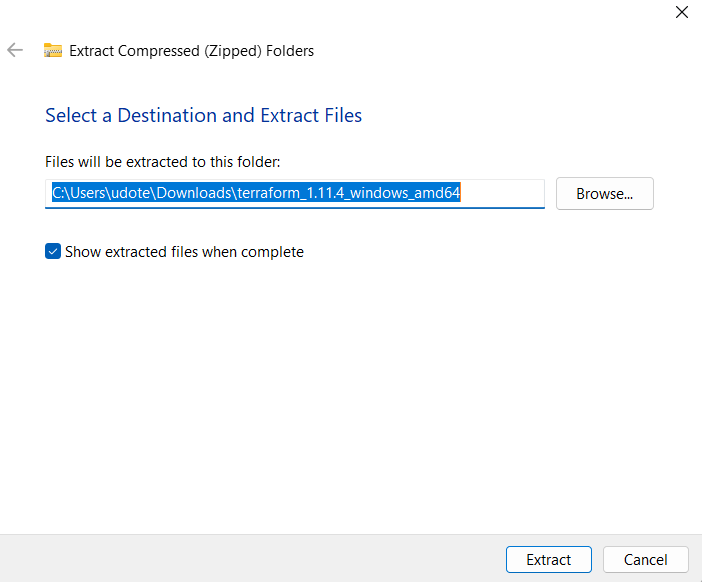
- Extract Terraform Executable: create a directory in C:\ and extract the terraform executable in the directory. Click on Browse to locate the destination file
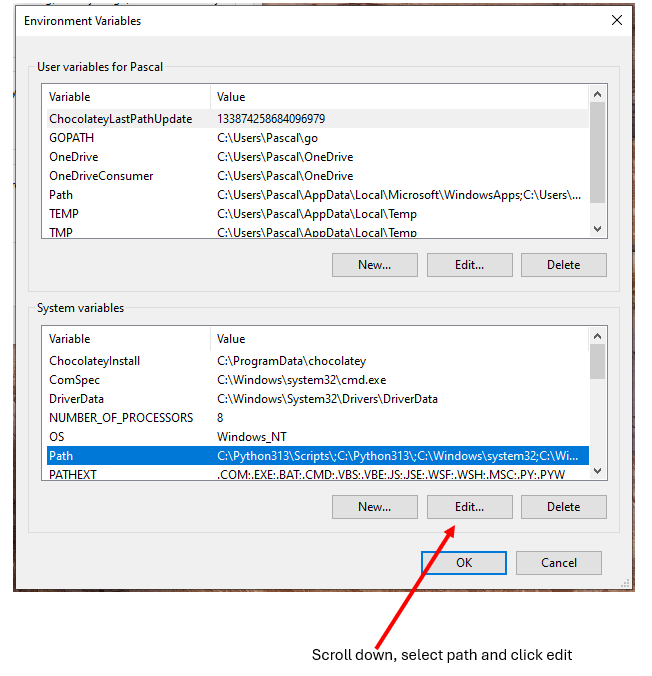
- Add a new Path in the Environmental Variables:
- Open the Start menu and search for “Environment Variables”
- Click on “Edit the system environment variables”
- In the System Properties window, click on “Environment Variables”
- Under “System variables”, find and select the “Path” variable, then click “Edit”
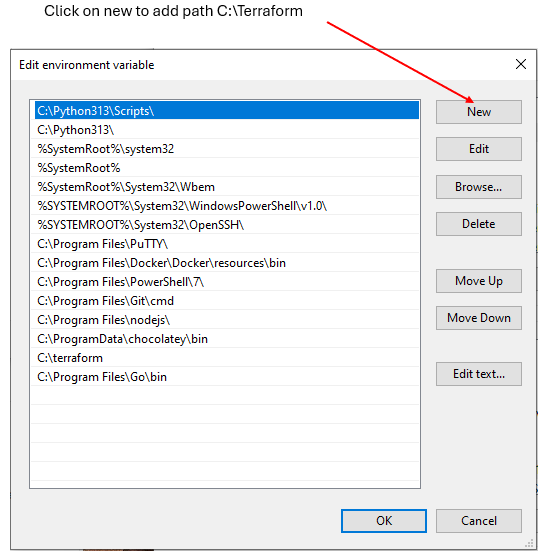
- Click “New” and add the path to the directory where you extracted Terraform (e.g., `C:\terraform`)
- Click “OK” to close all windows
- Verify Installation: Open a new command prompt and type. terraform -version. From the output, Terraform v1.11.3 have been installed.

In the next steps, create a project directory in the user profile directory. This directory will be name Infrastructure devops administration(infra-devops-admin). In this directory, we will create a folder called terraform. This folder will contain the following files vmware_provisioning.tf, variables.tf and terraform.tfvars.

Below is a script virtual machine (VM) machine resource to be provision. Load the script into the different files extension as mentioned below.
Step 2: Define Provider (vmware_provisioning.tf)
Step 3: Define Resources (vmware_provisioning.tf)
data “vsphere_datacenter” “dc” {
name = var.datacenter
}
data “vsphere_datastore” “datastore” {
name = var.datastore
datacenter_id = data.vsphere_datacenter.dc.id
}
data “vsphere_resource_pool” “pool” {
name = “Resources”
datacenter_id = data.vsphere_datacenter.dc.id
}
data “vsphere_network” “network” {
name = var.network_name
datacenter_id = data.vsphere_datacenter.dc.id
}
resource “vsphere_virtual_machine” “ubuntu_vm” {
count = 3
name = “devops-vm-${ count.index +1}”
resource_pool_id = data.vsphere_resource_pool.pool.id
datastore_id = data.vsphere_datastore.datastore.id
num_cpus = 2
memory = 2048
guest_id = “ubuntu64Guest”
network_interface {
network_id = data.vsphere_network.network.id
adapter_type = “vmxnet3”
}
disk {
label = “disk0”
size = 100
thin_provisioned = true
}
cdrom {
datastore_id = data.vsphere_datastore.datastore.id
path = “ubuntu-24.04.2-live-server-amd64
}
wait_for_guest_net_timeout = -1
}
Step 4: Define Variables (variables.tf)
variable “vsphere_user” {}
variable “vsphere_password” {}
variable “vsphere_server” {}
variable “datacenter” {}
variable “datastore” {}
variable “cluster” {}
variable “iso_path” {}
variable “network_name” {}
Step 5: Provide Values (terraform.tfvars)
vsphere_user = “root”
vsphere_password = “your_esxi_password”
vsphere_server = “Server IP address”
datacenter = “ha-datacenter”
datastore = “datastore1”
network_name = “VM Network”
iso_path = “ubuntu-24.04.2-live-server-amd64.iso”
Step 6: Outputs (outputs.tf)
output “vm_name” {
value = vsphere_virtual_machine.vm.name
}
After loading the scripts, open git bash terminal.
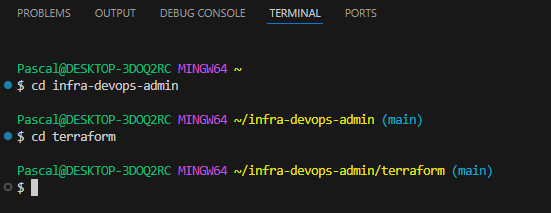
- cd into infra-devops-admin directory
- cd into terraform directory
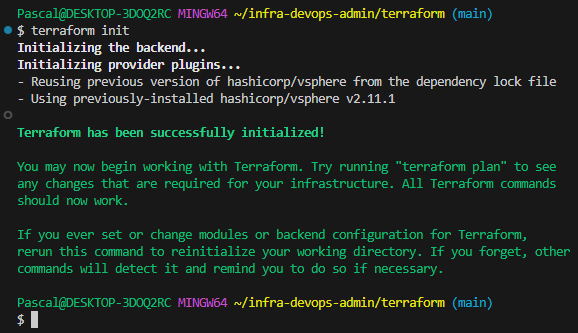
Next initialise terraform by running the command “terraform init”
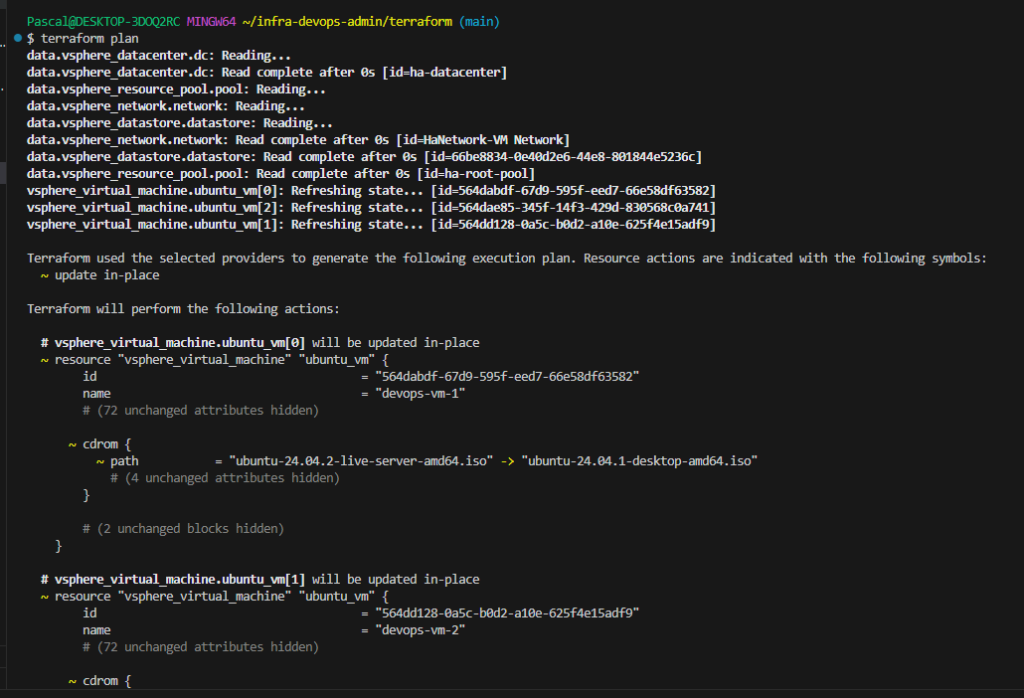
Run the command “terraform plan”
Next run the “terraform apply” command and lock into VMware ESXI host to view all devops-vm-1, devops-vm-2, and devops-vm-3 were successfully created

To uninstall the resources created, run the command “terraform destroy”
let’s connect in the comment section for further discussion.
Lets connect for further discussion